I’ve had a lot of problems photographing the different stages of flower production in the BoxCleva studio! My usually reliable camera which is an ‘autofocus’ one has decided to play up and and not autofocus.
But I’ll do my best to help you to make flowers which are similar to those you can buy in the shops online from Prima Marketing. Now, these flowers, beautiful though they are, are rather costly and you often only get a few in a pack. I’d like to show you how you can make flowers ad infinitum – cheaply. All you need is some mulberry paper blanks ( Docrafts, Wild Orchid Crafts, and there are several other shops that sell them ) which are white. You can buy many differing shapes of flower and usually a couple of sizes of each. You can mix and match them by shape or you can use the same shapes on one flower.
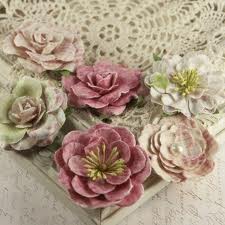
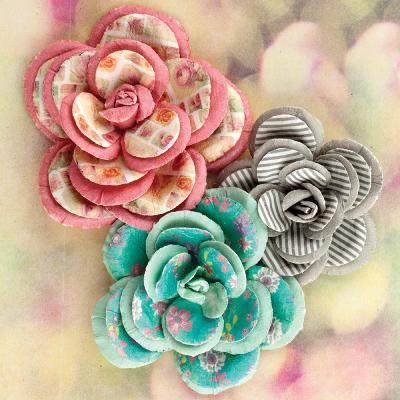
Prima flowers which are printed and ‘painted’
You will also need some ordinary craft papers, those that you like either plain or patterned. You’ll need a soft mat on which to shape your flowers and a couple of tools ( ball ended ) to make the flowers stand up. The next thing you need is water colour paint and perhaps some emulsion which come in the form of match pots. These can be had for about a £1 a pot at DIY shops. Chose those you can mix and match, to make up other colours and always have an eye on compatibility of colour. Now, you’ll also need some Tapestry Stamps ( or indeed some similar tiny stamps ) and some inks. These can be had from Rubber Stamp Tapestry. There are three stockists in the U.K. but the choice from RST themselves is so vast that it’s better to get them from the U.S. You might think that it’s cheaper from the U.K. Actually I’ve found there isn’t a lot in it with the costs of postage in the U.K. so high. Do go and have a look at the RST site. You’ll be blown over by the variety.Lastly you’ll need a flower punch which is compatible with the flower shapes you have chosen. You can of course cut these by hand if you wish.

Firstly we shall use LARGE petals.
The first we shall try is that which can be made by using the emulsion. With a small flat brush take some of the paint and lightly touch the petals of the blank flower you have chosen. Brush them from the middle to the tip and don’t worry if the petals are not fully covered. It doesn’t matter. Leave a gap in the middle and then take some green paint and brush the middle out into the petals, using the EDGE of the brush. Make sure it’s quite a thin amount and you’ll see how the paints merge.
Now, because your petals are a little damp with the paint, use your ball tool to mould the petals into shape.
If you’d like your flowers to be quite cupped use a large ball tool and go round and round in the middle of the flower, then out into each individual petal. If you would like it to turn over, use the tool on the underside and just do the tips. Turn the petal right sides and cup it again in the middle. Add three together and cup all three. If you would like them to be a bit crumpled, you can actually take them and squash them as the mulberry paper is very durable.When dry they will stay put in the shape you have made them.
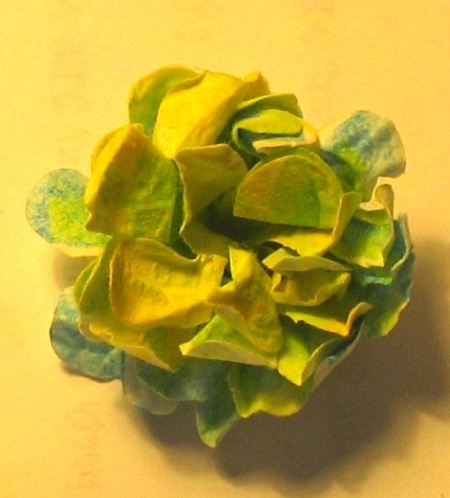
This flower has been stamped with blue ink before painting, with Tapsestry stamps and then crushed when wet.
You then need to take your stamps and with the ink colour of your choice, stamp the petals with a pattern. Here and there or all over, it’s up to you. Let things dry. You might like to re- cup or re-squash the flower if you have flattened it a bit.
Then all that’s needed is for you to add an embellishment in the middle, a pearl, a metal flower, a rhinestone, a bead or perhaps a sequin. You can of course also punch out another small paper flower and use that. Or you can make a small version of your big flower and add that to the middle.
If you would just like to have pattern and no other colour on your flower, stamp with several colours of inks with Tapestry Stamps, onto the white flower, overlaying as you go. You can of course use different stamps for each colour too, should you wish.
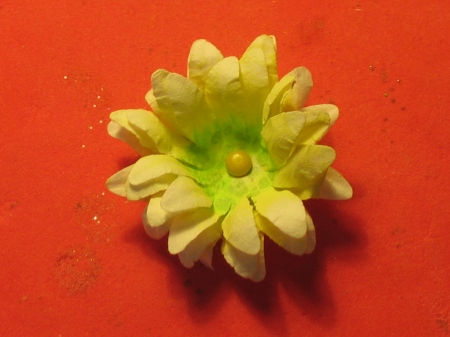
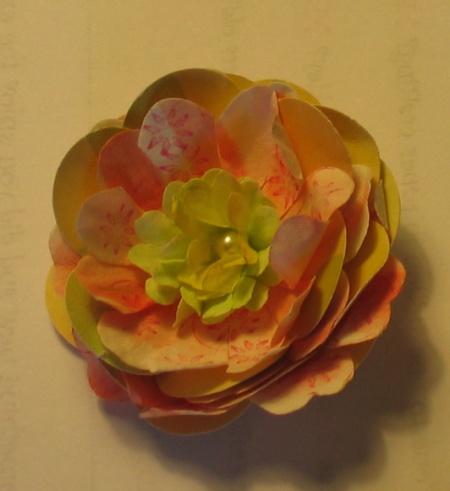
This pale yellow flower is touched with emulsion on the petals and then with green in the centre. Finally the middle is stamped with green ink with a Tapestry stamp and a brad is added.
Now to using water colour.
You can use it very thinly or you can have a bit more colour in it by working the paint a bit more, with less water. A smallish water colour brush isn’t really necessary but I find that they work well if I want to just touch a small area with paint.
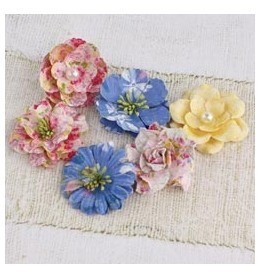
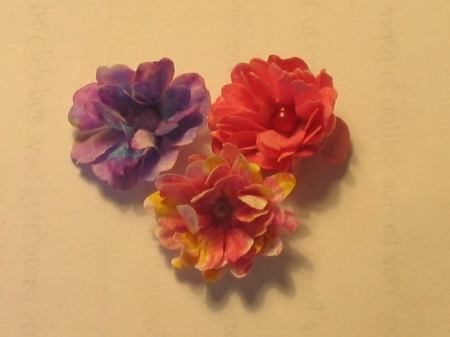
Prima flowers
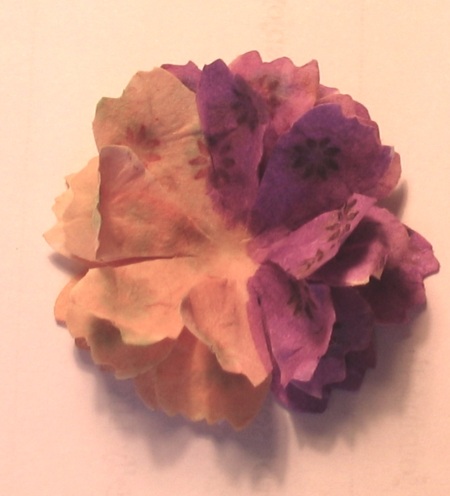
My version of similar flowers. The blue purple one has been ‘reversed’.
You can make these flowers two ways. If you want to blur the Tapestry stamp pattern a bit and only have water soluble inks, you can stamp first then paint after. If you have waterproof inks, you can paint before you stamp and if you want a crisp pattern, it’s best to stamp afterwards, with water soluble inks.
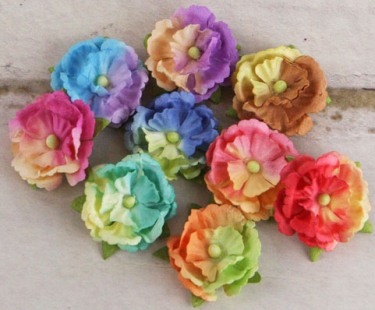
Tiny flowers for centres or just as they are.
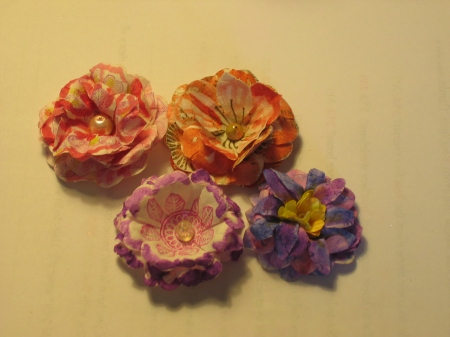
You don’t have to colour in the whole flower and you can use several colours on one flower. You can layer the petals ( you must have three at the very least to make a convincing flower ) and they don’t have to be the same colours or patterns of stamp. Use your imagination – Go WILD! Here Prima flowers are made in two colours each half and half and you can see how it’s possible to blend the colour. These are plain flowers with no pattern though.
Prima flowers
My version of the above with no centres as yet. The left one is patterned with Tapestry stamps.
Lightened so you can see the detail of the stamps.
Note the fancy edges too. You can achieve this by using deckle scissors or pinking shears and curling the edges as you dry the flowers.
As the mulberry paper is so tough, even if you handle and crush, cup or squash it at the wet stage, it will keep its integrity and that’s good. I use a hot melt glue gun to secure my petals together and you can bend the petals, should you wish and secure them with glue wherever you want , bend them over on each other, fold them over or crush them up and glue them, to make the most amazing flowers.
You can even cut the mulberry paper into a snake ( as I’ve taught you in previous posts) to make a centre like a rose. ( see next picture centres of flowers )
Next you can use ordinary craft paper to layer your flowers so that one petal becomes plain ( or printed patterned ) and the next one, is one which you have made from scratch. This is what the Prima version of this looks like and below is how you can make them look yourself. All you need to do here is cut down the white petals or make sure that your punched flower is larger than your white mulberry painted ones.
Prima flowers
My version of a similar type of treatment but with a smaller mulberry flower in the centre.
The smaller versions of the white mulberry blanks can be used in exactly the same way as the large ones, though you have obviously a smaller surface to paint and print onto.
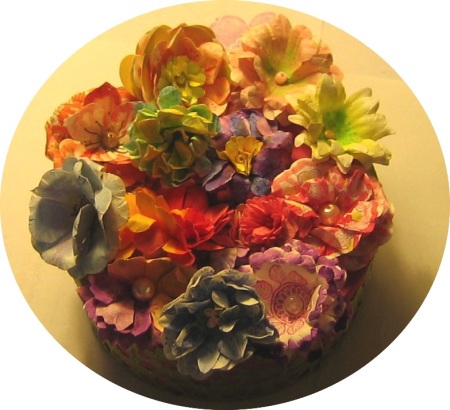
Now, what shall we do with all these pretty flowers…..why add them to a box of course!


April 2, 2013 at 4:17 am |
Great work with the flowers. I must get out my Tapestry stamps and try this, thanks!
April 2, 2013 at 8:12 am |
Do you know, Renee, I wonder why I haven’t tried it before! Have a good time with them.
Sx
April 3, 2013 at 5:11 am |
Wonderfully beautiful! Great idea.
April 3, 2013 at 8:23 am |
Thank you Hiipi H. Rubber Stamp Tapestry Stamps are SO useful! Sue
April 17, 2013 at 11:19 am |
[…] Just another WordPress.com site « Patterned Petals Prove Prima perfect! […]